
How to Face Your Quilted Wall Hanging and Art Quilt

Give your quilted wall hanging or art quilt a simple and clean finish by learning how to face your quilt. Faced binding hides the raw edges of a quilt sandwich without a visual frame like traditional quilt binding. Essentially, with faced binding you’re eliminating a design element from your final product and truly highlighting the pieced work on your wall hanging or art quilt.
Facing your quilt is easy and there are several ways of doing it. This tutorial will teach you how to face your quilt with hanging corners.
What you'll need

The materials and tools required* to face your quilt are not too different from traditional binding. So here’s what you need…
- Quilted quilt sandwich squared up / trimmed
- Fabric scissors
- Fabric coordinating the quilt back or overall quilt project for the quilt facing - how much fabric you’ll need will vary on the size of the project. You’ll have a better idea of how much fabric you’ll need in Step 1 of this tutorial.
- Quilting ruler - preferably a long one, i.e. 6" x 24"
- Rotary cutter
- Iron
- Ironing board or wool pressing mat
- Pins
- Fabric marker or pencil
- Point turner, a chopstick or pen with a cap
- Coordinating thread - pick something as close as possible in colour to the quilt back and / or to the quilt facing. I used Aurifil in Muslin (2311), 50wt cotton thread.
- Sewing needles
- Wooden dowel - can be found at your big box or local hardware, arts and craft store
- Sharp scissors (not for fabric) or handheld saw

Directions
Step 1: The first step is to figure out the lengths of the strips to cover the long, raw edges of the quilt sandwich. Don’t worry, I will touch on what you will need to hide the raw edges of the corners in step 2.
Lay the quilt sandwich on a flat surface. Measure the length and width of the quilt sandwich in inches. Then, subtract 3 inches from each measurement.
The quilt sandwich used in this tutorial measures 20" lengthwise and 20"widthwise. You will need to cut two of each length and width to cover all four sides of your project.
The width of the strips, regardless of the dimensions of the quilt sandwich, is 2½ inches. Therefore for this example, I cut four 2½" x 17" rectangles from the coordinating quilt back (or project) fabric.
In summary, here’s the formula in how to figure out the dimensions of the strips required for your wall hanging or art quilt:
Measure:
Length of quilt sandwich" - 3" = Length of strip"
Width of quilt sandwich" - 3" = Width of strip"
Cut:
Two 2½" x Length of strip" rectangles
Two 2½" x Width of strip" rectangles
Set rectangles aside for step 3.
Step 2: From the coordinating quilt back (or project) fabric, cut four 5" squares for each corner of the quilt sandwich.

Cut squares and rectangles from Step 1 and 2.
Tip: The larger the squares are, the more enforcement. The smaller the squares are, the less enforcement. Size of these squares will also be dependent on the size of the quilt.
Step 3: As shown in the photos below, with the wrong sides of the fabric facing each other, fold each square diagonally in half and press with iron.

And with the four rectangles from step 1, fold in half lengthwise, wrong sides facing each other and press with iron.

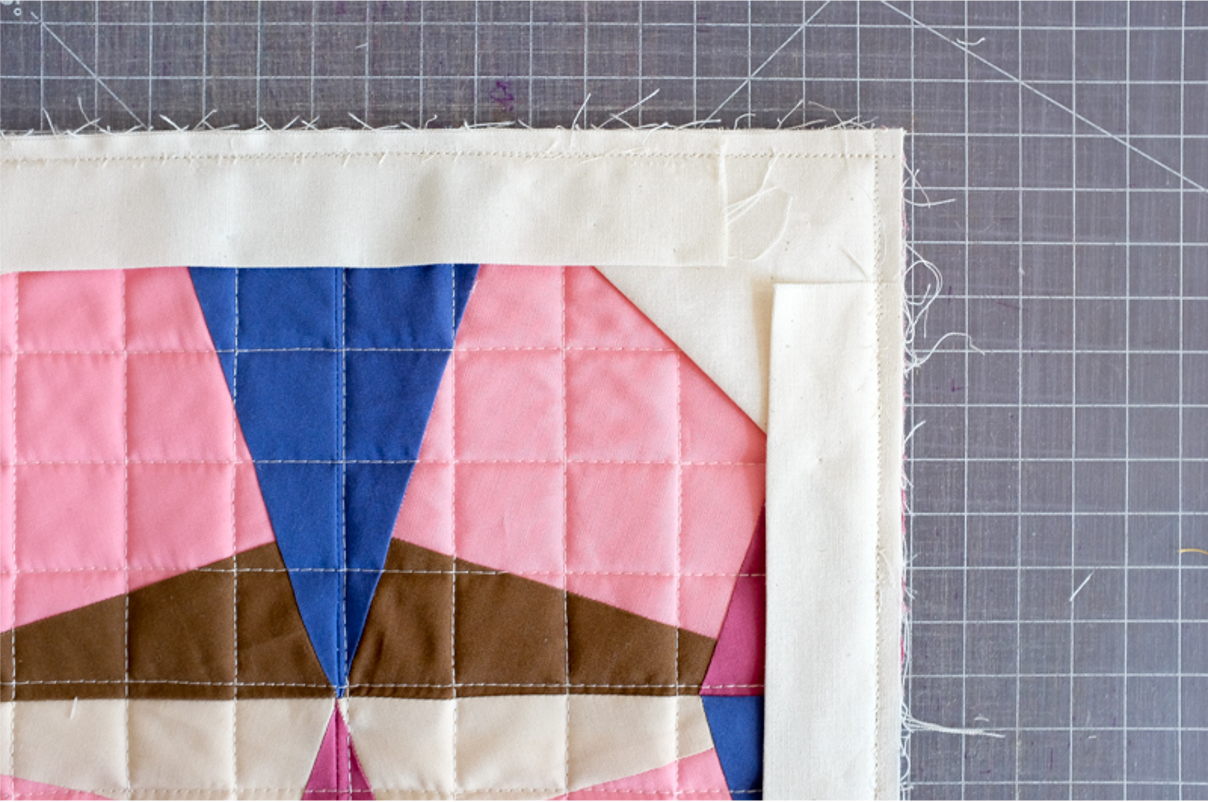
Step 4: Lay quilt sandwich on a flat surface with the quilt top facing up. Pin the four folded squares in each corner of the quilt sandwich with the raw edges of the folded squares aligned with the raw edges of the quilt sandwich.
Then, overlay the folded rectangles from the previous step, so the raw edges of the folded rectangles are aligned with the raw edges of the quilt sandwich. There should be a 1½" space between the start / end of the folded rectangle from the corner of the quilt sandwich. This is why we subtracted 3" from the length of the quilt sandwich at step 1.

Step 5: Sew ¼" away from the raw edge on all four sides of the quilt sandwich.
Step 6: With an iron, press the folded rectangles away from the center of the quilt sandwich.


Step 7: Edge sew all the folded rectangles into place.
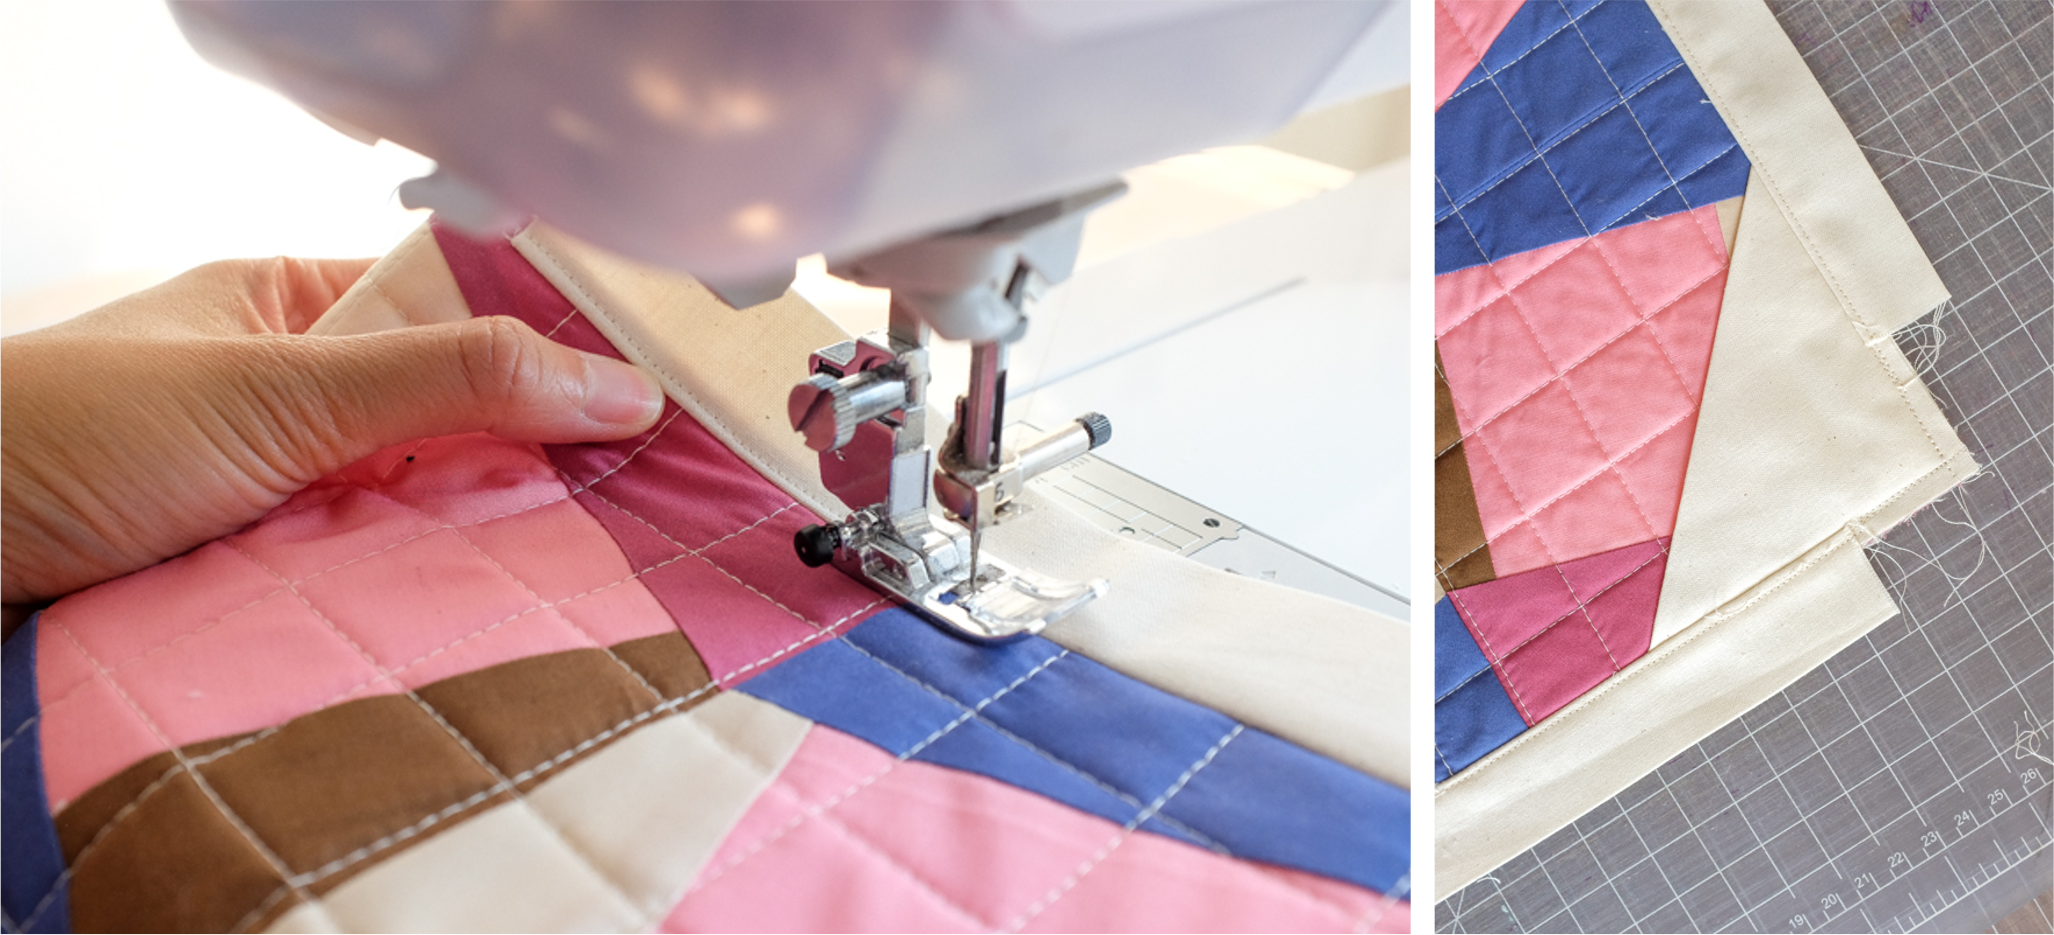
Step 8: With a pair of fabric scissors, carefully clip all four corners of the quilt sandwich to give your final project nice, crisp and pointy corners.

When clipping the corner, avoid the seams. Cutting into the seams causes the corners to fray. Here’s an example from another project where I did that. Oops!

Step 9: Turn all the folded rectangles and corner triangles to the backside of the quilt sandwich. With a point turner (or if you don’t have one, take a chopstick or a pen with the cap on), and work all the corners out to give it that pointy, crisp finish.

Step 10: With an iron, press the folded rectangles and corner triangles into place.

Step 11: Temporarily flip the corner triangles the other way and then slip stitch the folded rectangle onto the back of the quilt sandwich. Repeat this for all edges of the quilt sandwich.
Trim any loose threads.


Step 12: With sharp scissors (not for fabric) or handheld saw, trim the wooden dowel to the width of the quilt. Slide dowel into each corner triangle, hang and enjoy!

Mini quilt used in this tutorial is called Licorice Allsorts and is exclusively available in the November 2022 Modern Makes Box for Alderwood Studio. Grab your box here.
*This post contains affiliate links. If you use these links to buy something we may earn a commission.